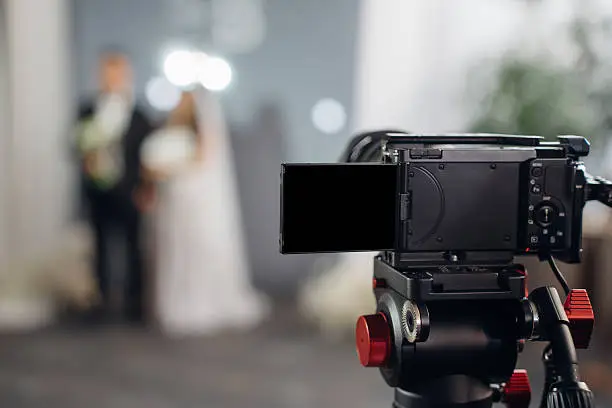
Photoshoot and videography, in their simplest form, are about creating lasting visual records. Whether it’s for personal memories, a business launch, or artistic expression, both involve carefully crafting images and sequences to tell a story or showcase a subject. They’re not just about pointing and shooting; they’re about intention, skill, and understanding what you want to achieve with those pixels.
In today’s world, visual content isn’t just nice to have – it’s often essential. From scrolling social media feeds to browsing online stores, high-quality images and videos cut through the noise and grab attention.
Making an Impact Online
Think about it: when you’re looking to buy a product, explore a service, or even decide on a restaurant, what’s usually the first thing you check? The pictures and videos. Blurry, poorly lit shots or awkward video clips can instantly turn people away, regardless of how good the underlying offering might be. Professional visuals communicate professionalism, care, and attention to detail, which builds trust with your audience.
Telling Your Story Authentically
Beyond just looking good, visuals are powerful storytelling tools. A photograph can capture a fleeting emotion, while a video can convey a narrative with sound, movement, and progression. These elements combine to create a more immersive and memorable experience than text alone. This is particularly important for businesses looking to connect with a target audience on an emotional level or for individuals wanting to preserve significant life events in a meaningful way.
Understanding the Basics: Photography vs. Videography
While often discussed together, photography and videography have distinct characteristics, though they share common foundations.
The Art of the Still Image: Photography
Photography freezes a moment in time. It’s about composition, lighting, and capturing an emotion or detail within a single frame.
Composition: The Frame’s Blueprint
Composition is how elements are arranged within your photograph. Good composition guides the viewer’s eye and makes the image more visually appealing. Rules like the “rule of thirds” (imagining your frame divided into nine equal sections and placing subjects along the lines or intersections) help create balance and interest. Other techniques include leading lines, framing (using natural elements to frame your subject), and negative space (the empty area around your subject, which can help it stand out). Understanding these principles allows you to intentionally craft a more engaging image.
Lighting: Sculpting with Light
Light is arguably the most crucial element in photography. It can set the mood, highlight textures, and create depth. Natural light, whether from the sun or through a window, is often preferred for its softness and authenticity. However, artificial lighting, like studio strobes or continuous LED lights, offers more control and allows for creative effects that wouldn’t be possible otherwise. Learning to identify good light and manipulate it (e.g., using reflectors or diffusers) is a skill that significantly elevates photographic results.
Technical Foundations: Aperture, Shutter Speed, ISO
These three settings form the “exposure triangle” and are fundamental to controlling how bright or dark your image is.
- Aperture: Controls the size of the lens opening, affecting how much light enters the camera and also influencing depth of field (how much of the image is in focus). A low f-number (e.g., f/2.8) means a wide aperture, more light, and a shallow depth of field (blurry background). A high f-number (e.g., f/16) means a narrow aperture, less light, and a deep depth of field (more of the image in focus).
- Shutter Speed: Determines how long the camera’s shutter stays open, controlling the duration light hits the sensor. A faster shutter speed (e.g., 1/1000 sec) freezes motion, while a slower shutter speed (e.g., 1/30 sec) can create motion blur.
- ISO: Represents the camera sensor’s sensitivity to light. A lower ISO (e.g., 100) means less sensitivity and typically cleaner images, while a higher ISO (e.g., 3200) increases sensitivity, allowing for shooting in low light but often introducing digital noise (graininess).
Understanding how these work together is key to achieving correctly exposed and aesthetically pleasing photographs in various conditions.
Bringing Stories to Life: Videography
Videography adds the dimensions of time, movement, and sound, offering a rich narrative experience.
Motion: The Flow of the Story
Unlike a static image, video is about continuous movement – both of the camera and within the scene. Smooth camera movements (pans, tilts, dollies, tracking shots) are crucial for professional-looking video. Stability is paramount, often requiring tripods, gimbals, or stabilizers to avoid shaky footage that distracts the viewer. Understanding how to direct action within the frame and capture compelling sequences contributes significantly to the video’s impact.
Sound: The Unseen Power
Often overlooked, audio is as important as visuals in videography. Muffled, distorted, or missing audio can ruin an otherwise great video. Using external microphones (lavalier mics for interviews, shotgun mics for ambient sound) can drastically improve sound quality compared to relying on a camera’s built-in microphone. Carefully considering background music, sound effects, and voice-overs also adds layers to the storytelling.
Editing: Crafting the Narrative
Raw video footage is just the beginning. Editing is where the story truly comes together. This involves selecting the best clips, trimming unnecessary parts, arranging them in a logical sequence, adding transitions, color grading (adjusting colors for a consistent look), and mixing audio. Effective editing transforms disconnected clips into a cohesive and engaging narrative that holds the viewer’s attention.
Planning for Success: The Pre-Production Phase

Good visuals don’t just happen; they’re meticulously planned. The pre-production phase is crucial for ensuring a smooth shoot and achieving your desired outcome.
Defining Your Vision and Goals
Before anything else, clearly articulate what you want to achieve.
What’s the Purpose?
Are you documenting a family event, showcasing a product, creating a personal portrait, or building a portfolio? The purpose will dictate everything from style to equipment. For a business, this might involve identifying target audiences and key messages. For personal use, it might be about capturing candid moments or a specific aesthetic.
Desired Style and Mood
Do you envision bright and airy, dark and moody, candid and natural, or polished and dramatic? Collecting reference images and videos (often called a mood board) can be incredibly helpful for communicating your aesthetic preferences to a photographer or videographer, or for guiding your own creative direction. This helps ensure everyone is on the same page regarding the final look and feel.
Location, Models, and Props
Once you have a clear vision, consider the practical elements that will bring it to life.
Choosing the Right Setting
The location plays a huge role in the visual story. Consider lighting conditions (indoor vs. outdoor, natural light availability), background elements, and accessibility. A busy street might work for an edgy fashion shoot, while a serene park is perfect for family portraits. Scouting locations beforehand allows you to plan shots and anticipate potential challenges.
Selecting Your Subjects
If you’re working with models or real people, consider their comfort level, availability, and how well they embody the intended mood or message. Briefing them thoroughly on what to expect, what to wear (if applicable), and providing clear directions on the day will lead to better results. For product photography, ensure products are clean, ready, and presented optimally.
Essential Elements: Props
Props can add context, visual interest, and help reinforce the narrative. A simple prop like a coffee cup can suggest a morning routine, while a vintage camera speaks to a nostalgic theme. Ensure props are relevant to your story and don’t distract from the main subject. Clean, well-maintained props make a big difference in the final output.
Showtime: The Production Phase

This is where all the planning comes to fruition. Good execution on the day ensures you capture high-quality raw material.
Camera Settings and Equipment
Having the right gear and knowing how to use it are non-negotiable.
Optimizing Your Camera
Regardless of whether you’re using a smartphone, a mirrorless camera, or a professional DSLR, understanding its capabilities is key. Focus on getting your exposure right (aperture, shutter speed, ISO), ensuring your white balance (color temperature) is accurate, and using the highest quality settings available for your output. For video, this often means shooting at a consistent frame rate (e.g., 24fps for cinematic, 30fps for standard) and resolution (e.g., 1080p or 4K).
Essential Gear for Photographers
- Lenses: Different lenses provide different perspectives. A prime lens (fixed focal length) is often sharper, while a zoom lens offers versatility. Wide-angle lenses are great for landscapes, while telephoto lenses are good for isolating subjects or capturing distant actions.
- Tripod: Essential for sharp images in low light, self-portraits, and achieving consistent framing.
- Reflectors/Diffusers: Help manage light – reflectors bounce light onto your subject, while diffusers soften harsh light.
- External Flash: Provides controlled, powerful light for various situations, especially indoors.
Key Equipment for Videographers
- Stabilization: Gimbals, tripods, or even monopod stabilizers are crucial for smooth, professional-looking video.
- External Microphones: Far superior to built-in camera mics for capturing clear audio. Lavaliers are great for voices, shotguns for isolating sounds.
- Lighting Kits: Continuous LED lights are popular for video as they allow you to see the effect directly.
- Multiple Batteries & Storage: Video especially consumes a lot of power and memory, so always have backups.
Directing and Posing (or Guiding)
Whether working with models or everyday people, effective direction is crucial.
Guiding Poses for Photography
For portraits, offer specific but comfortable poses. Don’t just say “smile” – give actionable advice like “look towards the light,” or “cross your legs naturally.” Demonstrate if necessary. Candid photography often involves less direction, but you might still guide people into certain activities or positions that allow for natural interactions. The goal is to make subjects feel relaxed and confident.
Directing Action for Videography
For video, think in terms of sequences and motion. Instead of a single pose, guide subjects through actions. “Walk from here to there,” “pick up that item,” “have a conversation.” Consider how the action will look from different angles and how it will contribute to the overall narrative. Encourage natural movement rather than stiff, artificial actions.
Crafting the Final Product: The Post-Production Phase
| Category | Photoshoot | Videography |
|---|---|---|
| Duration | 1-2 hours | 2-4 hours |
| Equipment | Camera, lenses, lighting | Camera, lenses, stabilizer |
| Editing Time | 1-2 hours | 4-6 hours |
| Deliverables | High-resolution images | Edited video |
This is where the raw footage or images are transformed into polished, impactful visual stories.
Selecting and Culling
The first step after a shoot is often the longest: reviewing everything.
Choosing the Best Shots
Go through all your images or video clips and select the strongest ones. Be ruthless. Look for sharp focus, good exposure, compelling composition, and authentic expressions. Don’t be afraid to discard anything that doesn’t meet your standards. For video, this means selecting your “takes” and identifying key moments.
Maintaining Consistency
When selecting, think about how the images or clips will work together. Are they part of a series? Do they tell a coherent story? Consistency in theme, mood, and overall quality is important, especially for a project with multiple visuals.
Editing and Enhancing
This is where the magic happens, bringing your vision to life.
Photo Editing Essentials
- Cropping and Straightening: Correct horizons and improve composition.
- Exposure and Contrast Adjustments: Fine-tune brightness and the difference between light and dark areas.
- Color Correction/Grading: Adjust white balance, saturation, hue, and vibrance to achieve the desired color aesthetic. This can range from subtle corrections to dramatic stylistic changes.
- Retouching (Selective Adjustments): Address minor imperfections like blemishes, distracting elements, or sharpen specific areas. Be careful not to overdo it, aiming for natural-looking enhancements.
- Noise Reduction/Sharpening: Clean up graininess (noise) and enhance detail.
Video Editing Techniques
- Rough Cut: Assemble your chosen clips in a preliminary order.
- Fine Cut: Refine transitions, trim clips precisely, and adjust pacing.
- Color Grading: Apply consistent color grades across all clips for a unified look. This is crucial for professional-looking video.
- Audio Mixing: Balance dialogue, music, and sound effects for clarity and impact. Ensure there are no sudden volume changes.
- Graphics and Text: Add titles, lower thirds, or other on-screen text to convey information or enhance storytelling.
- Effects and Transitions: Use subtle transitions to smoothly connect clips. Avoid over-the-top effects that distract from the content.
By systematically going through these steps, both photographers and videographers can elevate their raw captures into compelling and beautiful visual narratives.